A blog by Vitessesteve mostly about Triumph car stuff. Featuring articles about Standard Triumph car dealers. Includes new free technical literature such as Parts Catalogues, Workshop Manuals and Owners Handbooks.
People have been tuning and modifying the Triumph Vitesse for many years. Hot Car magazine May 1969 featured a Vitesse that had a Jaguar 3.8 engine in it.
The car was said to do 130mph and to have 250bhp. It was built by the well known Downton engineering. Based on a shortened Jaguar XK150 chassis. The Triumph Vitesse body was altered to fit.
Evans and Cutler of Totnes Triumph car dealer window sticker
This is the third in an occasional series about Triumph car dealers. Evans and Cutler of North Street Totnes in Devon are listed as a distributor in 1955, 1965, 1968/69 and 1974.
I emailed the existing business to ask if they recognised the sticker. Here is the reply.
Certainly is, mind you we have changed a lot since those days!
My father and Mr Cutler started the business in 1946 and I have been in the Garage for 50 of those years.
We were Standard dealers and then Triumph distributors which got swallowed up by BL when we had 5 garages and the whole of the BL range .
In 1982 we ditched the franchise and took on Ford .
They had a bodyshop at Harbertonford and a facility at Ivybridge. An article in the Exeter Express "Pinpointing the past with classic cars" written 3 November 2011 included 3 images of Evans and Cutler.
Evans and Cutler of Totnes view of exterior of garage and forecourt
Evans and Cutler showroom in Totnes, showing off the Triumph Toledo in March 1971.
Evans and Cutler showroom in Totnes, anniversary another view in March 1971
from Standard Triumph review February 1959
Three Standard 6-cwt. Vans, were supplied by Evans & Cutler Ltd, Standard-Triumph distributors, to Paul Pinch Ltd, radio and television engineers, who had branches in Totnes, Paignton and Torquay. The picture was taken in Paignton.
from Standard Triumph review June 1959
Evans and Cutler plastic tax disc holder
Still Trading
Currently (10-02-2016) the business sells used cars.
and amongst their stock at the time was a Standard Vanguard Six.
.
Vitesse saloons for the Devon Constabulary
It was reported in the Standard Triumph Review June 1963 - Vitesse saloons for the Devon Constabulary! Handing over the cars are Mr. A.C. L. Mills (second from left) and Mr. B.J. Roberts (right) of Standard-Triumph, to Superintendent Rundle (third from left). Mr K D Evans, Standard-Triumph distributor for Totnes, is on the Superintendent's left.
Plea for information
If you have any more information or recollections about this garage, photos of window stickers, dealer badges or sill plates etc please let me know. I can be contacted via the comments to this post or on facebook at https://www.facebook.com/stephen.weblin
I recently found an article about the Armstrong Lever Action Shock Absorber as fitted to the Triumph Vitesse and other Triumph cars. The article was on the North American Singer Owners Club website.
The Armstrong Lever Action Shock Absorber
The Armstrong New Super Double-Acting Self-Regulating Hydraulic Shock Absorber is of the Vertical Cylinder Type. All working parts are submerged in oil.
Construction
The body A is a zinc alloy die casting and bolts directly on to the frame of the car, the two cylinders B and C being connected by passages E and F. The double crank G and arm H are a force fit on serrated portions of spindle I, which rotates in the body A on generous double bearings. Connecting rods J connect the crank G to pistons K to which non-return recuperating valves N are fitted. The arm H is connected to the axle of the car link L.
How it Works
As the axle moves to and from the car frame, so the pistons move in and out of their respective cylinders pumping oil from one to the other. The interior of the body is filled with oil to within 3/8" from top of cover, any shortage of oil beneath the pistons is instantly made good though the recuperating valves N.
Cam valve (Self Regulating)
As the car axle moves to and from the car frame the oil pumped from the compression cylinder B to rebound cylinder C or cylinders C to B, and has to pass between the taper ended valve P and scew Q, which is adjustable to offer any desired resistance to the action of the axle.
As will be seen from the drawing the upper end of the valve F is held in contact with the cam on spindle I, which means that on fairly good roads the valve P is in its lightest setting and shock absorber gives a normal resistance--just enough--yet not too much to produce harshness, but when bad roads are encountered the spindle I oscillates and the contour of the cam depresses the tapered end of valve P further into the central port of screw Q and thereby increases the resistance of the shock absorber.
The automatic, variable resistance obtained from the cam movement makes this shock absorber entirely self-regulating, the resistance automatically increasing as required thus enabling the car to pass over bad with comfort equal to good roads.
Screw Taper Valve
As the axle moves towards the frame the oil is pumped from the cylinder B to cylinder C, but as it has to pass the spring loaded valve R a resistance governed by the tension on the spring is offered to the movement of the axle.
On the return or rebound stroke the oil is pumped from cylinder C to cylinder B, and as the ball valve only opens in one direction the oil must now find its way to cylinder B past the taper screw S, which is adjustable to offer any desired resistance to the rebound of the car spring.
Adjustment of the Cam Valve
Both rebound and compression are controlled by screw Q, to tighten rebound and compression slack nut T, taking care that the screw Q does not turn. Turn screw Q half a turn inwards and lock up the nut, taking care the the screw Q does not turn.
To reduce the resistance follow the above instructions, but turn screw outwards.
Screw Taper Valve Adjustment
Both rebound and compression are controlled by screw S.
The same instructions apply as for cam valve, but refer to screw S and nut U.
Note.--Shock absorbers adjusted too lightly make your car feel harsh and hard; we recommend slacking off first in case of doubt.
These shock absorbers will only work satisfactorily on Armstrong Super Shock Absorber Oil. Examine your shock absorber oil lever regularly. The correct level is 3/8" from top of cover.
Double Note: I personally have found these shocks to be quite reliable and I have been able to resurect several of these by just general cleaning and fresh oil. You should try that first prior to sending it out for rebuilding.
------------------------------------------------
Adjustable dampers
I had heard these existed and have now found a picture. These can be adjusted on the car without taking them apart.
MG works adjustable Armstrong lever dampers
Period adjustable shock absorbers often feature in accessory catalogues and go faster guides.
Due to the rarity of original adjustable lever arm dampers there are now firms remanufacturing and converting original dampers to be adjustable. One instance is for the MG Sprite with items made in the USA by Peter Caldwell, in Madison, Wisconsin being sold in the UK through http://www.petermayengineering.co.uk/.
Adjusting the units: There is a large hex head 'nut' at the bottom of the units, this can be unscrewed to remove the damper assembly, take care of the 'O' ring. As below:
The damper assembly looks as below when assembled:
Armstrong lever arm damper assembly
The little washers between the large diameter coil spring and the valve body set the preload on the BUMP damper valve. So add more washers to get more BUMP damping, try one or two washers at a time, you can easily find washers of similar id and od, if not file some.The little nut that compresses the smaller inner coil spring controls the REBOUND damping. This nut is soldered on its thread to stop it moving, easy to unsolder and resolder. Screw this nut in increases the REBOUND damping. Try one turn at a time, it is quite sensitive.
Do both together, clamp them together in a vice, then by hand pressure on the end of the levers you can compare their resistances to get them both similar.
Refit to car and test. Hours of fun there then!
Rebound valve adjustment starting point ~ compress back of the car and release, eg kneel on bumper and get off the suspension should return the car to static ride height and no more. It should not bounce beyond static ride height.
Bump damping adjustment ~ although it is ideal to set this low to get minimum vertical upward acceleration that you feel through your seat/spine. Ideally set bump damping as low as you can to prevent bouncing after a series of bumps or wallowing after quick steering inputs.
Borrowed from a Morgan website.
----------------------------------------------
Lever Arm Oil
Armstrong sold their own special grade of oil specially for lever arm dampers. What should be used now?
Motor bike shock absorber oil seems to be the recommended substitute. It is available in several different viscosities. 20 as used in older bikes is what can be used. Modern lighter grades will not be stiff enough. Stiffer oil such as 30 may damage the seals.
Some people have successfully used trolley jack oil. However it has been said such oil may suffer from foaming when dampers work hard and quickly - just when you want the damping action.
Original Armstrong lever arm damper assembly with o-ring
Later simplified Armstrong lever arm damper assembly without o-ring
According to Alex Pringle on the TR Forum: The old Armstrong Company merged with James Lyon in the early 1970s, and considerable change resulted.
Lever arm shock absorbers, as we think of them, had numerous and varied commercial and industrial applications . . . . automatic door closers being the most often noticed. The old Armstrong company thought of all of these items as appropriate for reconditioning, whereas the new company preferred to simplify (and cheapen) designs - and to abandon reconditioning in favour of straight replacement.
Lever arm shocks manufactured post 1974 or thereabouts were of the simplified variety, until the eventual cessation of mainstream production, towards the end of the decade.
This brochure produced by Armstrong explains the range of Armstrong parts available to tune car suspension. I found this document on the http://mk1-performance-conversions.co.uk/ website a great source for early Mini enthusiast. It shows the optional adjustable dampers available for Triumph cars at the time.
Armstrong adjustable dampers
Armstrong adjustable dampers and springs for a works Triumph Spitfire being fettled by Jigsaw classic Triumph specialists. These dampers from the 1960's were supplied from the collection of David Pearson of Canley Classics.
Selectaride
Selectaride electrically adjustable shock absorbers with 4-position "cockpit control". I think this alternative form of adjustability is interesting.
Armstrong marketed electrically adjustable shock absorbers with a 4 position "cockpit control" a switch. These dampers were an ultimately unsuccessful product and were dropped by car manufacturers after they proved to be unsatisfactory in service.
Refurbising
Several companies offer to rebuild your old dampers including marque specialists like racestorations in the UK and Moss in the USA. Additionally firms like Stevson Motors will bebuild units. Stevson has a long history in this field having started out in 1944 from their base in Birmingham UK.
Other sources
Armstrong dampers were used on many different makes and models of cars over the years. Useful and interesting content can be found found various forums - the TR Register has covered the subject on many occasions.
More information
If you have any information or images you can share to make this article more useful to other readers please get in touch via the comments to this post.
When trying to refit the body to the chassis after some work it is very likely that it will seem to be a difference shape. The number of packaging pieces between the body and chassis may not be the same as when the body was taken off. If any parts of the chassis have been replaced or repaired the shape of the chassis may have changed.
This factory produced guide contains lots of useful pictures and instructions.
You can get a copy from my website at http://vitessesteve.co.uk/ServiceTrainingNotes
The workshop manual has details of what shape the chassis should be again copy available from my website..
Another source of info about the size and shape of the chassis is the Bodywork Repair Data supplement to the Motor Trader service data for the Triumph Vitesse MkII.
I have at last got around to replacing the front tyres on my Vitesse. Had the tracking checked and it was at 7.5 rather than 1.5 toe in. How did it get like that? Normal wear and tear occording to the tyre bay chaps at Selecta Tyre Ltd. 2 Vredestein T-Trac 175/70 for £55.56. Had them inflated with nitrogen just like F1 for an extra £1.25 a tyre. Total with balance and tracking £108.53, not bad I reckon.
I have at last got around to replacing the front tyres on my Vitesse. Had the tracking checked and it was at 7.5 rather than 1.5 toe in. How did it get like that? Normal wear and tear occording to the tyre bay chaps at Selecta Tyre Ltd. 2 Vredestein T-Trac 175/70 for £55.56. Had them inflated with nitrogen just like F1 for an extra £1.25 a tyre. Total with balance and tracking £108.53, not bad I reckon.
We used my Vitesse to tow my other halfs dead little Renault 5 out of the yard for Tommy Croyden and daughter "the wrecker" to take it away. The 5 had stood awhile and one of the tyres was almost completely flat, so I had to pull pretty hard to get the thing to start moving - a little slipping the clutch was needed to start. Used a tow rope on the Vitesse tow bar. No real problem doing the job the Vitesse has alot of low down grunt. I wonder how many Triumphs get used for towing.
Out Saturday night til late so was always going to be a quick visit any way. Got to the show for 1.00pm.
Was looking for a decent secondhand door or a door skin but found some treasure on Mark Field http://www.jigsawracingservices.co.uk/ stand. New old stock doors for little more than the skins a real bargain!
Now how the hell am I going to get them home? I had no tools in car having had a tidy up post MOT. So had to buy a cheap set of spanner for £1.00. Then had to take the passenger seat out and pack it upside down behind the drivers seat. Then I used the tow rope to tie the 2 doors against the roll cage and passenger door handle. Got some strange looks in the carpark.
A good show I got to talk to several people I have meet in cyber space. Meet a couple of french Triumph people and got to practice my school boy french - a common interest made communication easier.
A fellow Triumph Sports Six Club member has posted this on their messageboard.
Heated Screens, anyone? Posted By : Jason Green, 09-Nov-2006, 08:24pm
If any one is interested in a heated screen, please register your interest here.
Current project is for heated front and rear screens for the Herald/Vitesse and heated rear screens for the GT6.
All screens are laminated.
The minimum production run is 15. So when we reach 15 names for each type I'll contact all by PM to confirm.
Prices are from £140 for the front, £120 for the GT6 rear screen and £140 for the Herald/Vitesse rear, all subject to VAT.
I'd like a Vitesse front.
Next, please.
-----------
I would like 1 front screen and 1 rear screen for my Vitesse. If you are interested you can either visit the TSSC messageboard or contact me and will pass your message to Jason.
I have read a tale on: http://www.justdrive.ca/gt6/ which reminded of a not dissimilar incident that befell my Vitesse some years ago. So sent poor Andre an email.
Sorry to read of your news.
I had the bell housing fail on my Vitesse at speed some years ago. The gearbox started to come through the transmission tunnel. (Fortunately into the passenger foot well.) I was pushing the car hard at least 4500rpm in overdrive top!
I guess that the bell house broke first which left the gearbox attached to the prop. Being attached to the prop rather than the bell housing the gearbox broke through the tunnel. The continuing motion of the car pulled the prop off the end of the gearbox, the UJ jokes were smashed. There was a hell of a lot of noise. Fortunately the road was empty and I was able to pull the car up straight.
At the time it was a very unusal event for nobody in the West Midland Triumph community in the UK had ever seen such a thing. The recovery driver told me how lucky I was that the prop runs above the chassis at the transmission as he remembered picking up the remains of an old Ford where the prop had dropped and dug into the road!
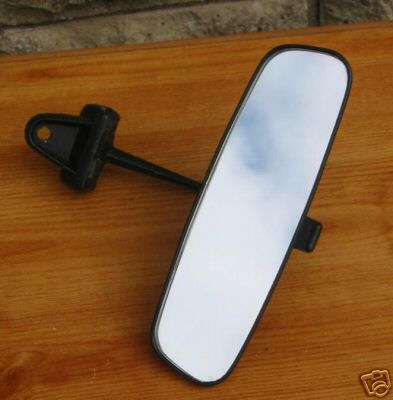
I know I could get a mirror from somewhere like Halfords that would need sticking on the glass or hold on by suction but would prefer a Triumph part if poss.
I also know that the sun visors will need cutting down to size as all the dipping mirrors are bigger than the original equipment non-dipping mirror, unless you know of a small dipping mirror.




 Op
Op