This blog has been replaced.

Showing posts with label TR7 Sprint. Show all posts

Tuesday, October 13, 2015

TR7 removable hardtops

I bought a detachable hardtop for my TR7 convertible to make it just a little more practical.


It has done a good job of keeping the rain and snow off me.  It turns out that my hardtop is made by Honeybourne Mouldings rather than Lenham.   Honeybourne hardtops are available new again after the firm reintroduced them.  Apparently the design had to be renewed as the original moulds were no longer up to the job.

Triumph TR7 Honeybourne Moulding hardtop
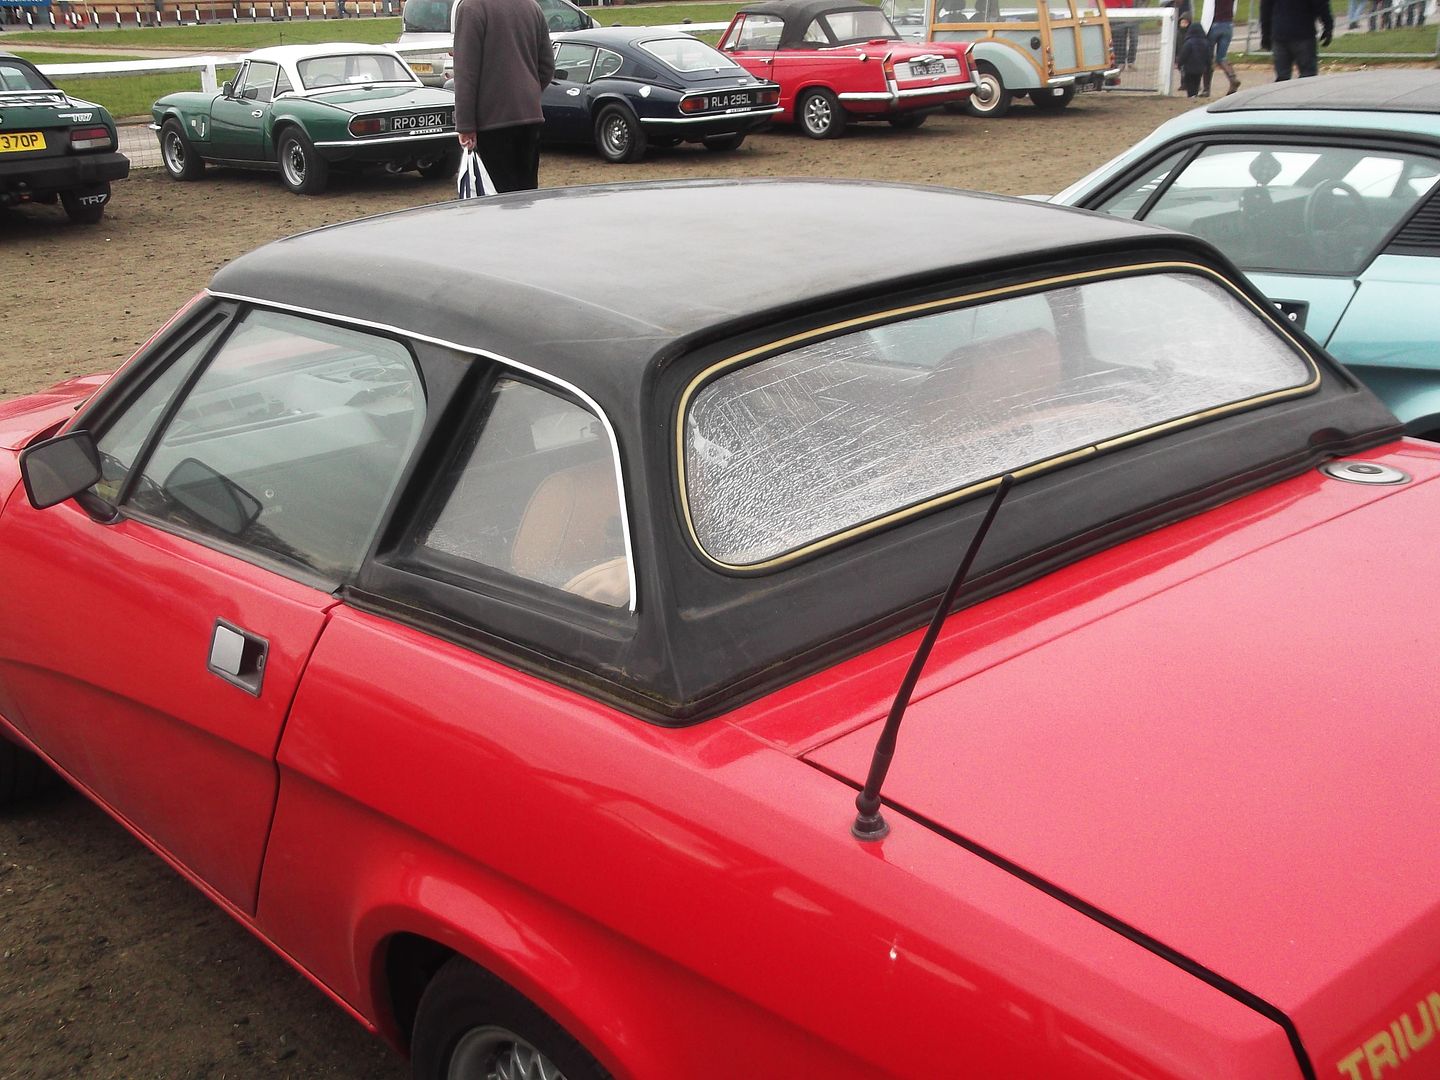
Honeybourne TR7 hardtop
 The windows are different on a Lenham as shown below.
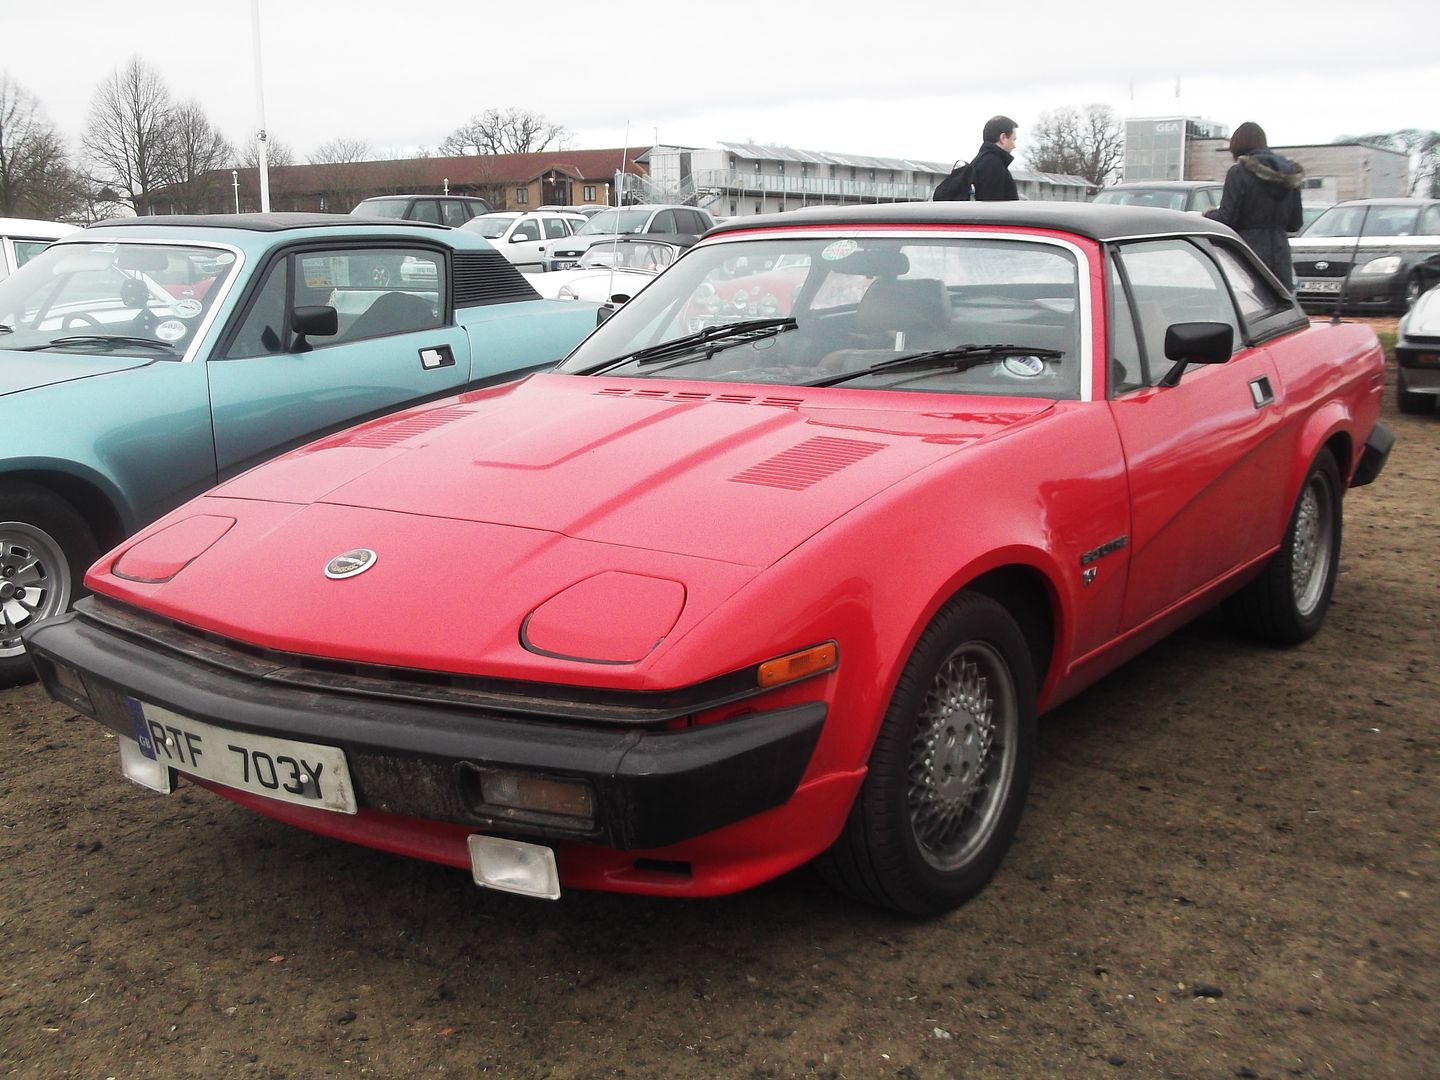
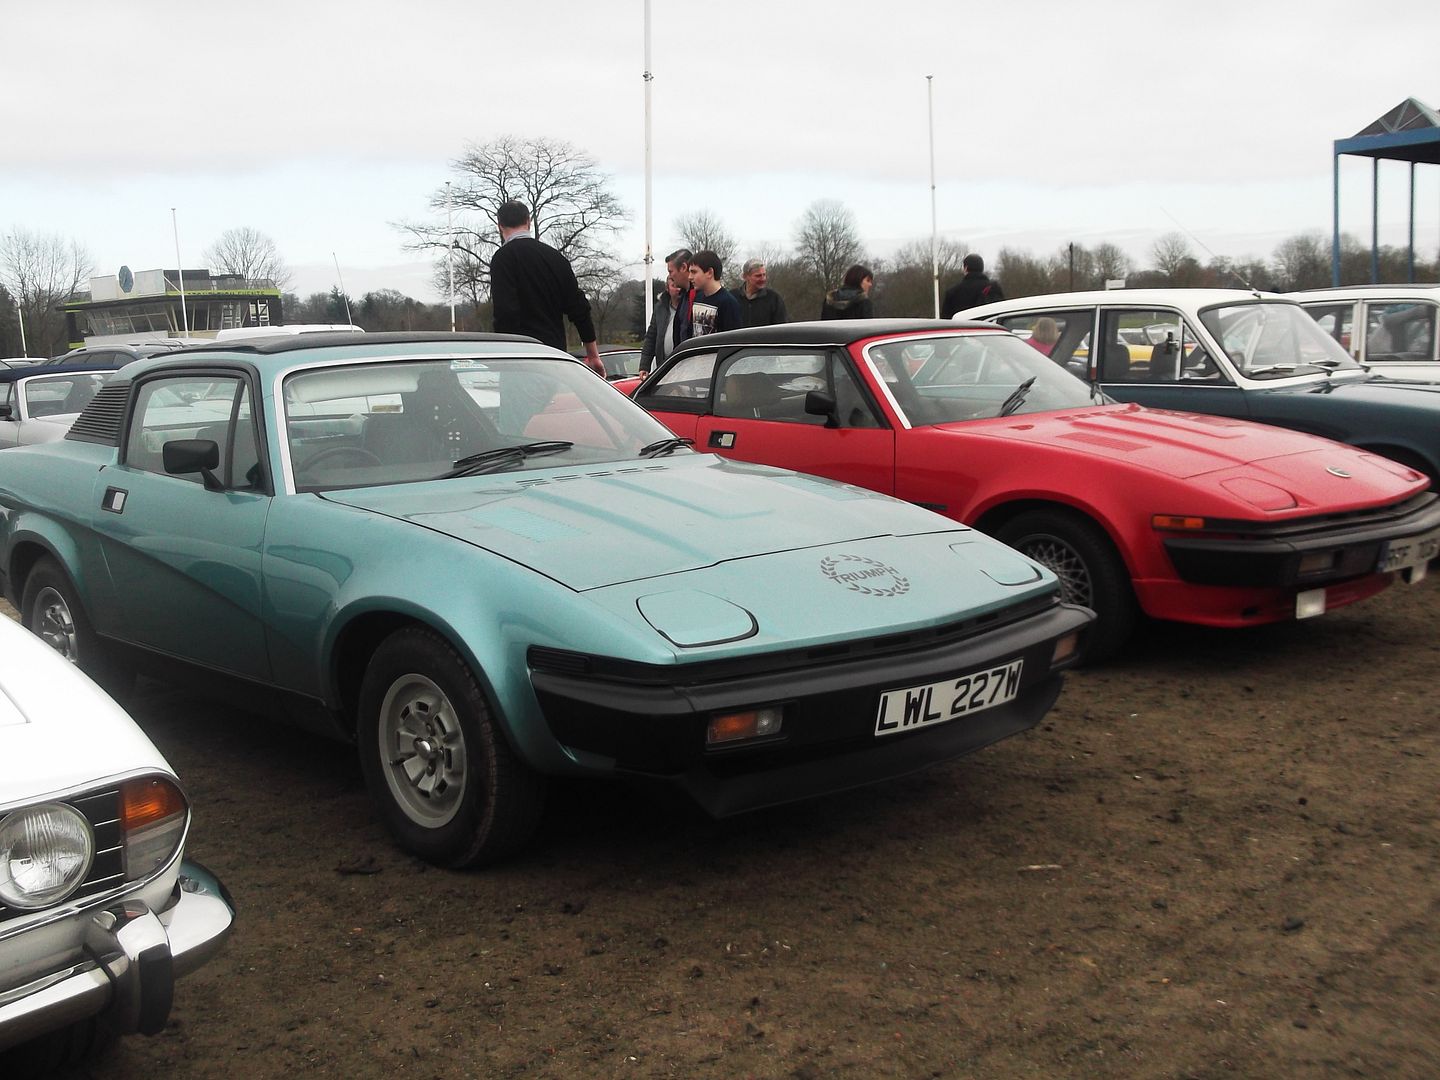
Lenham hardtop
The rear window in a Lenham is the same size amd shape as in the TR7 fixed head.  Before I realised I had a Honeybourne rather than a Lenham I bought a heated rear windows from a TR7 fixed head as I fancied having a demistable back window.

Both Lenham and Honeybourne hardtops fix to the car in the same way,
Triumph TR7 Honeybourne Moulding hardtop view of undderside
clipping to the header rail at the front and by J bolts to the hood frame near the B post of the car.

Alternative hardtops

A German design.

Lenham


Lenham hardtop advert

DIY Amerian

DIY Amerian hardtop 1

DIY Amerian hardtop 2
A DIY Amerian made hardtop.

Smooth Line

Smooth Line hardtop for Triumph TR7
Smooth Line hardtop
Smooth Line hardtop from USA. Still being made as I write this.
http://www.smoothline.com/triumph.php

Smooth Line hardtop exterior
Triumph TR 7-8 Hardtop with Haartz Vinyl Exterior view above. Triumph TR 7-8 Hardtop Interior view below.
Smooth Line hardtop interior

SnugTop

SnugTop hardtop 1
The SnugTop design as made in the USA.

SnugTop hardtop 2 for Triumph TR7
SnugTop hardtop 2

Extract from Motor

The 3rd May 1980 edition of Motor magazine contained details of two new accessories for the TR7. A roll over protection bar and a detachable hardtop.

Cover for TR7

QUICK OFF the mark, Lenham have introduced a detachable hard-top for the Triumph TR7 convertible. Made from glass fibre the roof is supplied in black or may be painted to match the car. The tinted rear window has heating elements, the interior is fully lined with cloth and the side windows open The roof can be supplied with a tilt or take-out Amilite sun-roof (as can all Lenham hardtops). Prices with VAT are: £345 and £488.75 with Amilite sunroof. Lenham Motor Co. Limited, 47 West Street, Harrietsham, Kent.

Wednesday, March 18, 2015

TR7 Repair Operations Times

Triumph TR7 Repair Operations Times
I recently bought this Triumph TR7 Repair Operations Times manual on eBay.  This factory produced manual in May 1976. It sets out the time taken to do many of the workshop tasks described in the Repair Operations Manual.  I will be adding a copy to my website later. 

I am told that there are later editions.  I would like a later edition as my car is a 1981 convertible.
 
 Click here if you want a copy now.  

Introduction page of Triumph TR7 Repair Operation Times

Page 1 of Triumph TR7 Repair Operation Times


Friday, January 16, 2015

smelly carpets

Decided to tackle the smelly carpets in my TR7. I found felt carpet underlay which does not seem to be a very sensible material for an open top car.
As you can see the felt has stayed wet and gone rotten.  The white patches look like mildew.
The felt was fitted under all the carpet so looks like I will have to take out the lower centre console (with the radio) again to get the felt takes on the transmission tunnel.  Should have done it when I had all the fascia out to replace the heater matrix.
Found this label on the back of the trim piece just forward of the front of the doors in the footwell.

Now what to put instead of felt is the question.  I am thinking something like a Dynamat product would be good.

Thursday, January 23, 2014

Its covered


Fitted my new Specialised Covers Stormshield cover over my TR7 Sprint convertable. Looks to be an excellent product. Fits very well, they made it to fit over my non-standard Honeybourne Mouldings hardtop.

Only problem I can see is that to use the straps that pass under the car I have to lie on the ground to pass the straps under the car.  Car gets new cover and stays snug under its cover but I get wet and or dirty laying on the drive to fit the straps.

There is enough room under the cover for the stubby radio aerial on the rear wing to be folded down.  I was offered the option to have Velcro slot for the aerial to poke throu the cover.  I like the contrast colour for the door mirror pockets.

PS This blog features on the Club Triumph website along with many other Triumph blogs.  I got a helpful suggestion from there - use an extending metal measuring tape under the the car to pull the strap from one side to the other.

Sunday, December 22, 2013

Saturday, April 20, 2013

TR7 Sprint heater hose

TR7 Sprint heater hose

My TR7 Sprint has its heater attached to the engine via some custom plumbing. Here is a picture of the hoses that link the pipes thru the bulkhead to the custom pipe work. Do these look like the normal heater hoses? Are they available separately? I wonder how much are they?

I have tried using lengths of straight rubber but that does not work as the ends to be linked are not inline and there is it not enough room to use a curved straight piece, so I need a hose that is curved as shown in the photo.

They connect to the steel heater pipes that come throu the bulkhead at one end. At the other end having passed to the inlet manifold side of the engine they connect to more metal pipework that in turn connects to the manifold etc. Here are some more pictures to show the detail.


I suppose I may end having to fit a Sprint adapter plate. I want the car back on the road so have refitted the old hoses for now.

Here is a picture of a Dolomite Sprint engine (thanks Beans http://tr7beans.blogspot.co.uk/) Seems this the basis of the heating plumbing on my engine.

Triumph Dolomite Sprint engine - showing heater hoses etc

Thursday, April 11, 2013

Swapping out the heater and mystery wiring

TR7 dashboard area showing interior with heater out
This morning I got the heater out.  A quick call to Rick at S&S Preparations showed that I had missed a couple of fastening that go throu the bulkhead.  To be fair they were covered in a layer black stoneguard so were not easy to see.

Getting to the heater box has meant taking all the fascia out.  To get the fascia out had remove the lots of other stuff/trim: the a-post covers, the switch panel, the gear lever console, the steering wheel, the instrument panel, the drivers seat. As my car had various extra had to disconnect the radiator fan override, some of the radio wiring, disconnect the oil pressure gauge from the bottom of the fascia.

Hidden ignition switch and green radiator fan over-ride switch
Whilst the car is in this state I will able to investigate the mystery extra wiring.  There is a hidden key/ignition switch which is wired into the ignition loom - trouble is I do not have the key - the switch was well hidden I only found it when I was in the footwell looking up.  The flick switch to the left of the steering is still a mystery - it is linked into the radio wiring - which is a really complex bunch of colored wires - think I will leave that alone as it works.  Intend to add a proper separate earth for the radio rather than continue to relay on it being lopped into the earth on the back of the rheostat.

oil pressure gauge and mystery switch no2

Monday, March 11, 2013

More snow


Too cold this morning to drive the still heater-less TR7 so it will have to be the Skoda.

Monday, March 04, 2013

Friday, March 01, 2013

Fitting an automatic switch to the radiator fan

Currently my TR7 Sprint has a manual override switch to control the fan mounted fan. I have bought a thermostatic switch control from a MG specialist on eBay. I thought it would be good to try to do the wiring in the style of how Triumph did it. Cars fitted with air-con had thermostatic controlled fans.


I found this circuit diagram on teamnet http://www.team.net/TR8/tr8cca/wedgelab/other/schematics/schematics.htm


Now need to get some wiring and inline fuse - on order from Vehicle Wiring Products my favorite vehicle wiring specialist.

20/04/2013 The thermocouple sensor part seems to be too long. The top radiator hose has a bend in it near the radiator so the sensor needs to be either flexible or shorter max 30mm I think. Alternatively to get the job done will fit into the bottom hose.

Friday, February 01, 2013

simple and cheap fix


It is not pretty but it is effective. Got some j-bolts off eBay the sort used in roofing. 220mm long bolt with the j hooked around the hood frame and the threaded tail poking through the bracket on the Lenham hardtop. That should stop the top lifting at speed.

Sunday, January 27, 2013

agreed value sorted and then locked in


Rather than send photos to get the agreed value insurance confirmed I went to TSSC HQ. Got the car valued and a good long chat. A great drive through snowy east midlands.

On coming home and parking up in the yard I was unable to open the drivers door from inside so had to fold myself out of the passenger side. Not easy as I am 6ft 1in tall and the car is full of bits of trim. Another item for the snagging list.

Was able to open it from outside after a bit of fiddling. Seems like the mechanism probably needs a good clean up and lubricate.

Lubricated the anti burst latch and the door seems to open much easier.

Saturday, December 29, 2012

heater and heated rear window


The Honeybourne hardtop is now on the car.  Have spent more time getting the interior lighting to work.  Because all the lighting that can be dimmed did not work I started at the lighting rheostat.  All seemed OK there so followed the wiring onto the cigar lighter to find that it was not earthed.  When an earth was fitted to the cigar lighter most of the heater control lighting started to work. Took the bulbs out and cleaner up the connections - now have all 4 heater lights working.  

Then traced the wiring to the switch panel above.

Here again a bit of cleaning up the connections got both lights to work.  With the heater console off it was clear that neither of the outer sliders were properly connected. I hope that may explains the lack of cabin heating because the outer slider turns the heat on and off.

Looking at the heated rear window switch I can not see how the warning light works.  The switch has a plastic panel at the top with the symbol on to, see below. Also looking at the wiring diagram there should there be a heated rear window warning light.  Where is this located on the car?  The switch has a hole in it that would allow a light to be inserted from behind. There is no obvious spare wiring for such a light visible at present as I have yet to take the top off the dashboard.

Triumph TR7 Heated rear window switch


.PS On taking the dash top off I was able to retrieve the wiring for the heated rear (demister) window switch.  The wiring loom included the wiring for a demister despite my car being a convertible.  At the rear of the interior I was also able to find the ready fitted demister wiring.

The heated rear window (demister) switch fits straight in. You just have to make a hole for it to look out of the switch panel by carefully cutting out the relevant part of the panel.  The lettering for below the switch should also be there too.